
Laying Instructions for Handmade Terracotta Floor Tiles
[/vc_column_inner][/vc_row_inner][vc_row_inner][vc_column_inner][vc_column_text css=””]The procedure for fixing our floor tiles is a little different from that of many other types of tiles. These instructions apply to Aldershaw’s Sussex terracotta range of tiles and may or may not be applicable to other tiles. Please read these laying instructions carefully and should be followed by anyone involved in the laying of Sussex terracotta tiles.[/vc_column_text][/vc_column_inner][/vc_row_inner][vc_row_inner content_placement=”middle”][vc_column_inner offset=”vc_col-lg-offset-3 vc_col-lg-6 vc_col-md-offset-2 vc_col-md-8″ css=”.vc_custom_1715932778036{margin-bottom: 50px !important;}”][vc_column_text css=”” text_align=”center”]THE IMPORTANCE OF KEEPING THE TILES REALLY CLEAN THROUGHOUT THE LAYING AND SEALING PROCESS CANNOT BE OVER EMPHASISED.[/vc_column_text][/vc_column_inner][/vc_row_inner][vc_row_inner content_placement=”middle”][vc_column_inner width=”1/2″]Floor Bases;
[vc_column_text css=””]Solid concrete or sand and cement screed are the best substrates on which to lay the tiles.Suspended timber floors should generally have a covering of plywood screwed to them so that they are rigid and cannot move. (movement of the underlying wood can crack the joints between the tiles or even the tiles themselves).
[/vc_column_text][/vc_column_inner][vc_column_inner width=”1/2″]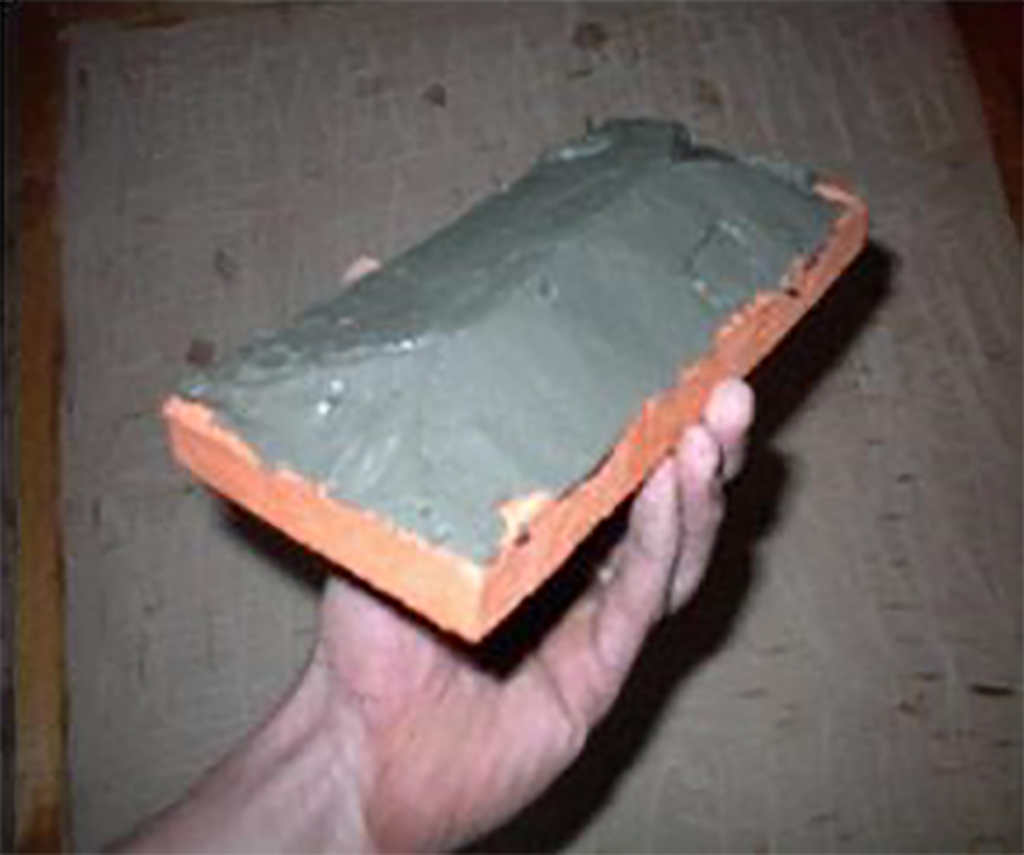
Preperation, Sorting and Laying;
[vc_column_text css=””]Surface must be free from dust, dirt, plaster, paint, wax or any foreign matter. If laying on newly concreted floor it must have had sufficient time to set & dry.The tiles may vary in width by an average of a quarter of an inch depending upon size and must be sorted by eye for both colour and size as they are laid. Small cracks, colour and size variation all combine to make a unique and a floor rich in character.
Our tiles are extremely hard (therefore hard wearing) but can be cut with an angle grinder. However if much cutting has to be done, a wet diamond saw (e.g. clipper bench) is easy to use and can be hired.[/vc_column_text][/vc_column_inner][/vc_row_inner][vc_row_inner content_placement=”middle”][vc_column_inner][vc_column_text css=””]We strongly recommend that the tiles should be laid out on the floor before applying the adhesive to ensure that the pattern fits the area to be tiled, that the joints are consistent etc. any cutting can be carried out at this stage.
We recommend a joint width of between 4-8mm. A temporary fixed chalk line can be used to keep the rows straight.
Tiles should be bedded in about 5mm (1/4 inch) of tile adhesive. We recommend a cement based adhesive such as one of the Brit Adhesives range. Fig 1 shows the buttering of the back of the tile.
The position of the tiles can be adjusted for some 10 minutes after initial fixing depending of course on the choice of adhesive. Floor tiles can be subject to light foot traffic after about 24 hours.[/vc_column_text][/vc_column_inner][/vc_row_inner][vc_row_inner content_placement=”middle”][vc_column_inner]
First Sealing Coat;
[vc_column_text css=””]Before pointing, the tiles should receive their first coat of sealant. The type and make of sealant is very much a personal choice depending upon the appearance preferred and the level of on-going maintenance required after laying.We will be only too happy to discuss your requirements with you and can supply or recommend a range of products. Initial sealing can be carried out before, during or after laying.
Apply with brush or polish applicator, working sealer well into the surface. Depending upon the sealant chosen surface will normally be dry enough for light traffic in 6 hours and should be left 24 hours prior to further treatment.[/vc_column_text][/vc_column_inner][/vc_row_inner][vc_row_inner content_placement=”middle”][vc_column_inner width=”1/2″]
Grouting;
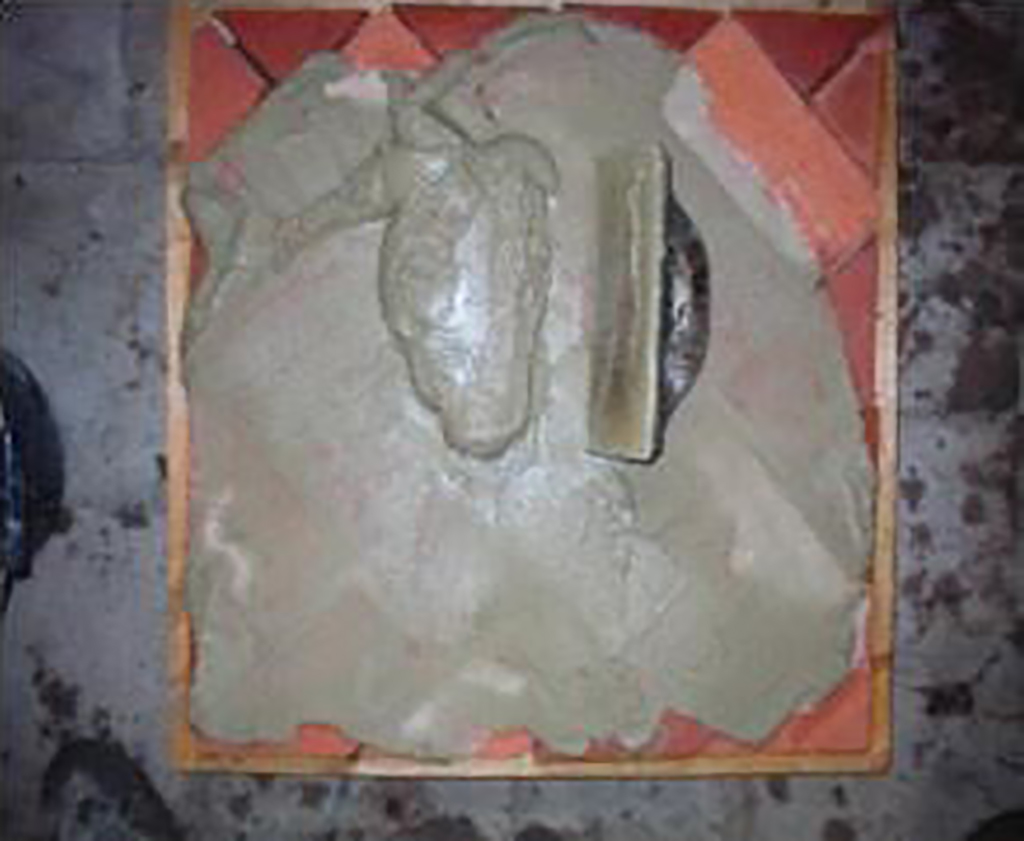
[vc_column_text css=””]We recommend a propriety floor tile grout either sandstone or grey in a colour to choice. Using a rubber squeegee or trowel, thoroughly work the grouting mortar into the joints, (concentrate on no more than 2 metres squared at a time), ensure that the joints are completely filled to the face edge of the tile before the grout starts to set (refer Fig2).After the grout has firmed-up but before it has set, remove all excess grout from the surface of the tile using clean water and sponge/cloth (fig 3).
Again the importance of thoroughly and repeatedly cleaning the surface with clean water and a sponge after grout has been applied cannot be over emphasised.[/vc_column_text][/vc_column_inner][vc_column_inner width=”1/2″]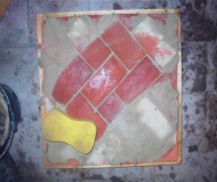
Final Coat;
[vc_column_text css=””]Once grouting is set and dry apply the second* coat of your chosen sealer over both tile and grouted areas. Leave a further 24 hrs before your floor can join every day Life.*Depending upon your choice of sealer you may require more coats.
[/vc_column_text][/vc_column_inner][/vc_row_inner][vc_row_inner content_placement=”middle”][vc_column_inner]
Materials Needed
[vc_column_text css=””]Tile adhesive; Brit Adhesives range of adhesives or similar rapid setting, slow setting, for over underfloor heating or flexible as needed.Grout; Brit Adhesives or professional Floor tile grout, sandstone or grey.
Sealers; ‘Pavegard’ Water based Acrylic sealer or 50:50 Boiled Linseed oil and White Spirit/turpentine
Finish ; ‘Lithofin’ Classic wax antique/wax or a good proprietary terracotta wax
All products come highly recommended and can be ordered through Aldershaw with the exception of boiled linseed oil. We strongly advise that you read the instructions on the back of the above products before use.
If you require any further information please contact us at Sussex Terracotta.[/vc_column_text][/vc_column_inner][/vc_row_inner][vc_row_inner equal_height=”yes” content_placement=”middle” css=”.vc_custom_1728301175718{padding-right: 30px !important;padding-left: 30px !important;}”][vc_column_inner width=”1/2″ css=”.vc_custom_1728301157889{padding-top: 20px !important;padding-bottom: 20px !important;background-color: #2a3434 !important;}”]
